

Blog
How to Assemble a Flat-Pack Dining Table (Step by Step)

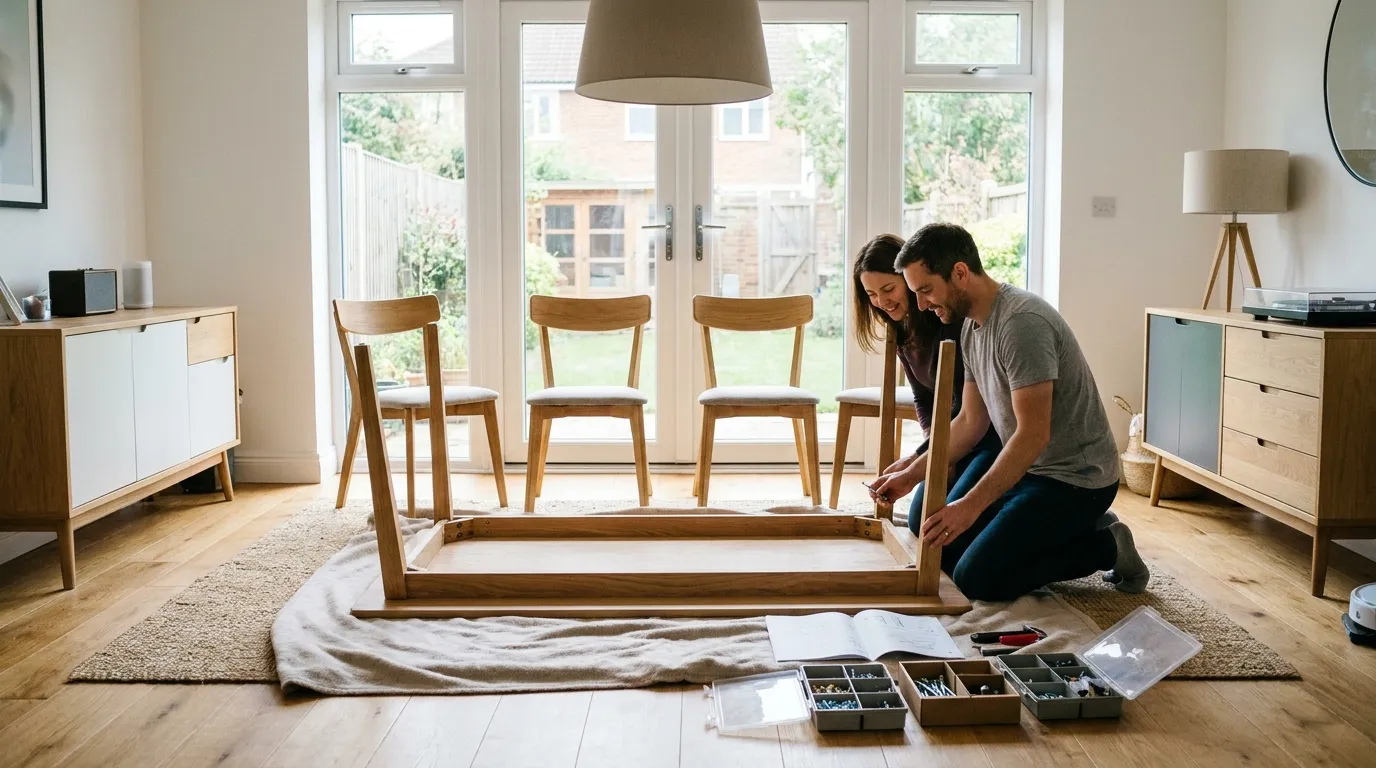
Your new dining table has arrived. The boxes are in the room. Now comes the part that puts a lot of people off flat-pack furniture entirely: actually building it.
It does not need to be stressful. A dining table is one of the more straightforward flat-pack builds, provided you work in the right order and avoid a handful of common mistakes. This guide walks through the full process, from unboxing to the final wobble check, specifically for a dining table and chairs set rather than generic flat-pack advice that does not quite fit the job.
If you have not yet chosen your table, our complete dining table and chairs buying guide covers size, shape and material in full. This article picks up once your set has already arrived at your door.
Quick answer:
Clear a large, soft, flat area in the room where the table will actually live. Unpack everything and check it against the parts list before you start. Build the tabletop and legs first, tightening every fixing only loosely until the whole frame is square. Assemble chairs one at a time using the same method. Fully tighten every fixing only once the frame sits square and level, then do a final stability check before you use the table.
Tools and Space You Will Need
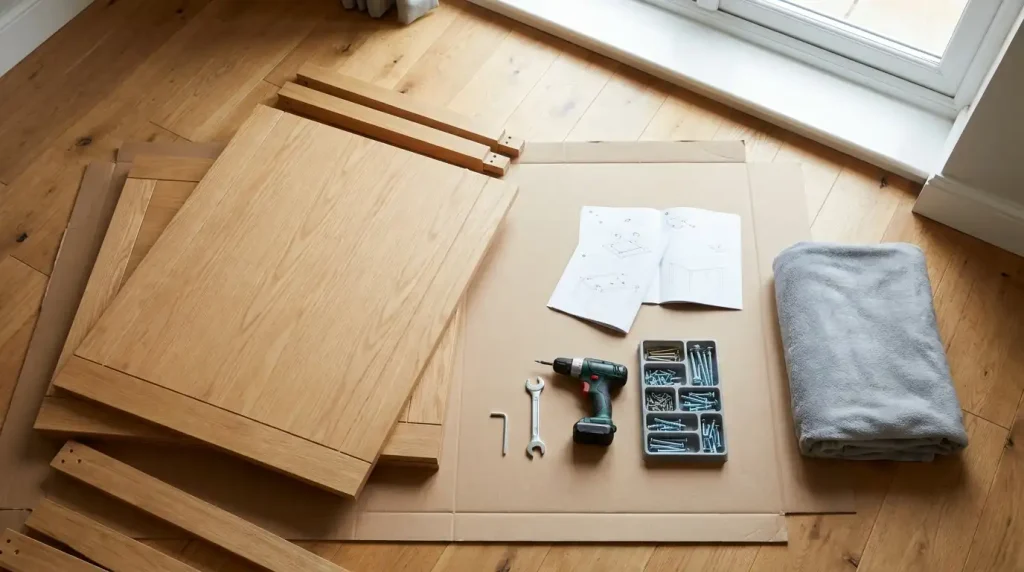
Most flat-pack dining tables include everything required to assemble them, but a few extras make the job noticeably easier.
- The tools provided: Usually an Allen key and sometimes a small spanner. These are sized specifically for the fixings in your box, so use them before reaching for your own tools.
- A cordless screwdriver or drill, for the early stages only: This speeds up starting screws, but switch to hand tightening for the final stage, since power tools make it easy to over-tighten and strip a fixing.
- A soft, flat surface: A carpeted floor, a folded blanket, or the flattened cardboard packaging itself all work well to protect the tabletop and chair frames from scratches during assembly.
- A second pair of hands: Particularly for turning a large or glass-topped table the right way up once assembled. This is the single most useful thing you can arrange in advance, and it prevents most accidental damage during a build.
Choose the room the table will actually live in as your assembly space, rather than building it elsewhere and moving it afterward. This avoids the risk of an assembled table not fitting through a doorway or hallway, and it saves you from moving a heavy, fully built piece of furniture any further than necessary.
Before You Start: Unpacking and Checking Parts
This step gets skipped more often than it should, and it is the one most likely to save you real frustration later.
- Open every box in the room the table will live in: And remove all packaging materials, including staples and packing straps, which can scratch the finish if left in contact with the wood or glass.
- Lay every part out on your soft surface: Grouped roughly by type: panels, legs, hardware, and any glass or specialist components.
- Check everything against the parts list: In your instructions before you begin. Every KosyKoala order includes a full hardware list, and if anything is missing or damaged, our team can normally arrange a replacement within a few days rather than requiring a full return.
- Separate small hardware into a container: Such as a bowl or tray, to stop screws and bolts from rolling away or getting lost in packaging.
- Keep all hardware away from children and pets during assembly: Small fixings present a genuine choking hazard, and general UK home safety guidance from organisations such as RoSPA consistently flags small parts as a risk worth actively managing around young children, not just during assembly but while packaging is still in the room.
Key note: if a part is missing or damaged straight out of the box, contact us before starting assembly rather than trying to work around it. It is far easier to swap a single part before the table is built than after.
Step by Step: Assembling the Table
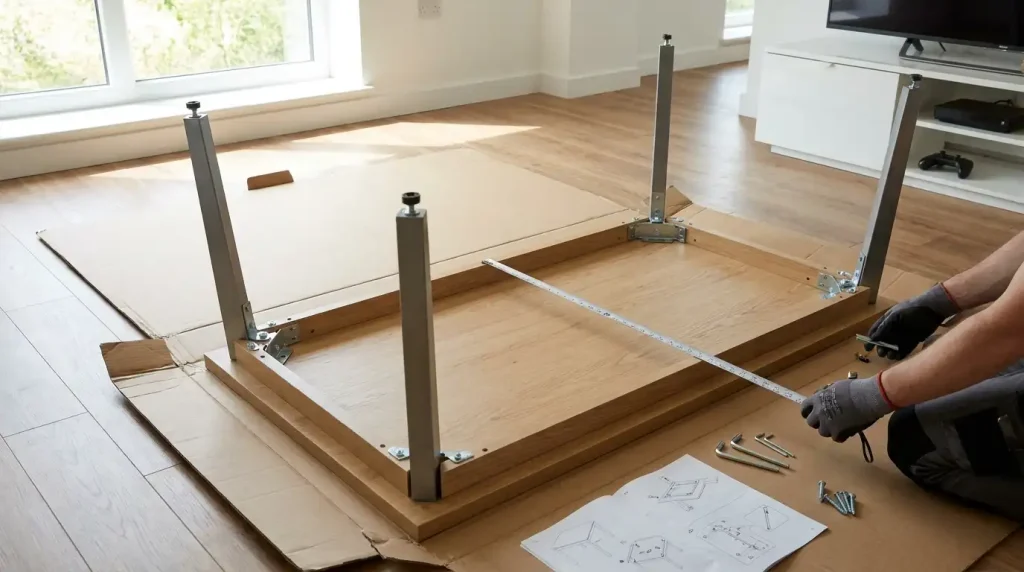
Once everything is unpacked and checked, work through the table itself in this order.
Step 1: Position the tabletop upside down.
Place the tabletop face down on your protected surface, so the underside, where the legs attach, faces upward. This keeps the visible surface protected throughout the build and gives you clear access to the fixing points.
Step 2: Attach the first leg loosely
Locate the pre-drilled holes or corner brackets on the underside of the tabletop, and attach the first leg using the fixings provided. Start every screw or bolt by hand first, and only tighten it partway, roughly 75 per cent, rather than fully.
Step 3: Repeat for the remaining legs, in the same loose stage
Attach each remaining leg the same way, keeping every fixing only partially tightened at this stage. This is the detail most generic guides mention but rarely explain properly: leaving fixings loose lets you make small adjustments to the whole frame before anything is locked into its final position.
Step 4: Check that the frame is square before final tightening
With all legs loosely attached, check that the tabletop and legs sit evenly, with no twist or lean in any direction. Adjust as needed at this stage, since this is your last real opportunity to correct alignment easily.
Step 5: Fully tighten every fixing, one leg at a time
Once the frame sits square, go back and fully tighten each fixing in turn. Hand tightening at this final stage gives you a better feel for when a fitting is properly secure, without the risk of over-tightening and stripping the fitting that comes with a power tool.
Step 6: Turn the table the right way up carefully
With a second person, turn the table over onto its legs, lifting from the frame rather than the tabletop edges alone, particularly important for a heavier or glass-topped design.
A Note on Glass-Top Dining Tables

If your table has a tempered glass top, a few extra precautions are worth taking during assembly, beyond the standard steps above.
Glass tops are usually a separate component from the frame, placed onto the assembled base once the frame itself is fully built and turned upright. Lift the glass with both hands, supporting it from underneath rather than gripping only the edges, and lower it onto the frame slowly and evenly, checking that it seats correctly into any rubber pads or clips provided before letting go.
Avoid sliding the glass into position once it is resting on the frame, since this can scratch both the glass and the frame beneath it. If your table uses toughened glass, meeting the BS EN 12150 safety standard covered in our buying guide, it is built to break safely if it is ever damaged, but this does not mean it should be treated roughly during assembly. Our round glass dining table with black and white chairs and similar glass-top sets in our range are designed for straightforward assembly, but the glass component specifically always benefits from an unhurried, two-person approach.
Step by Step: Assembling the Chairs
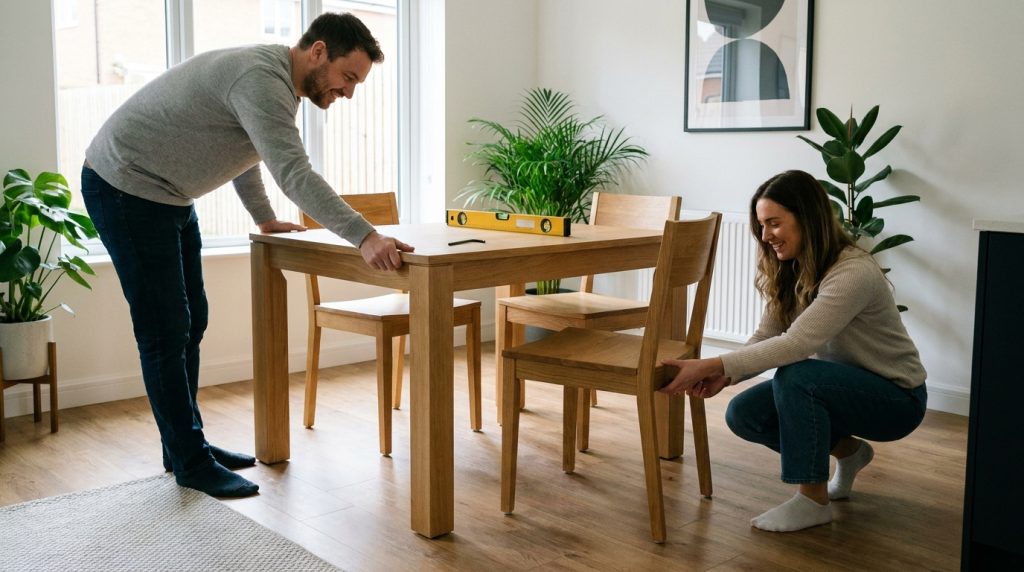
Chairs follow the same core method as the table, but they are worth doing one at a time rather than partially building several at once.
- Lay out the parts for one chair only: Working on a single chair at a time avoids mixing up similar-looking legs, brackets, or screws between chairs, which is a common and avoidable source of frustration.
- Attach the legs to the seat frame loosely: Following the same partial-tightening principle used for the table.
- Attach the backrest, if it is a separate component: Checking that it sits centred and square against the seat frame before tightening anything fully.
- Check that the chair sits flat and does not rock: On a hard floor if possible, before final tightening. This is much easier to correct now than after every fix is fully secured.
- Fully tighten every fixing: Then move on to the next chair, repeating the same process individually.
Building chairs one at a time takes slightly longer than laying all of them out together, but it genuinely reduces the risk of a mismatched or misaligned chair reaching the final tightening stage before a problem is spotted.
Assembling a Bench, If Your Set Includes One
A bench follows a simpler version of the same process, usually with fewer individual parts than a full chair, since there is no backrest to align in most designs.
Attach the legs to the bench seat loosely first, check that the whole unit sits flat and does not rock on a hard floor, then fully tighten every fixing once you are satisfied with the alignment. Our dining set with a matching bench uses this straightforward structure, and checking that the bench sits level before final tightening matters just as much here as it does for the table itself, since an uneven bench is more noticeable in daily use than a single uneven chair leg.
The Two-Stage Tightening Method, Explained Properly
This is worth understanding properly, since it is the single habit that prevents more assembly problems than any other single tip in this guide.
Fixings are designed with a small amount of tolerance, meaning the holes are very slightly larger than the bolt or screw itself. This tolerance exists specifically to let you shift and adjust panels slightly during assembly. If you fully tighten each fixing as you go, you lose that adjustment room, and any small misalignment gets locked into the frame permanently.
Working loosely first, checking that the whole structure is square and level, then tightening fully as a separate final stage, uses that built-in tolerance properly. It takes slightly longer than tightening as you go, but it is the difference between a table that sits perfectly level and one with a persistent, hard-to-fix wobble.
Checking Stability Before You Use the Table
Once assembly is complete, do not treat the job as finished until you have checked the whole set properly.
- Rock the table gently from each corner: Checking for any movement in the legs or frame. A small amount of give is normal on some designs, but a genuine wobble suggests a fixing needs retightening.
- Check each chair individually the same way: A chair that seemed fine during assembly can still develop a slight wobble once weight is properly applied.
- Use the adjustable feet, if your table or chairs include them: To correct any unevenness caused by your floor rather than the furniture itself. Many UK homes, particularly older properties, have floors that are very slightly uneven, and adjustable feet exist specifically to correct this without needing to force a fixing tighter than it should go.
- Sit at the table properly for a few minutes: Rather than just visually checking it, since some minor issues only become apparent under real weight and movement.
Key note:
If a wobble persists after retightening and adjusting the feet, check that the frame itself sits square rather than continuing to tighten fixings further. A persistent wobble is more often a sign of a slightly twisted frame than a loose screw, and forcing fixings tighter will not correct it.
Common Assembly Mistakes to Avoid
- Fully tighten fixings as you go: Rather than working loosely first and tightening only once the whole frame is checked and square.
- Using a power drill for final tightening: Risks stripping a fixing that is far harder to fix than simply finishing the last turn by hand.
- Assembling on a hard, unprotected surface: Leads to avoidable scratches on the tabletop or chair frames.
- Mixing up parts between multiple chairs assembled at once: Rather than working through one chair fully before starting the next.
- Skipping the parts check before starting: Only to discover a missing fixing partway through the build.
- Lifting a glass tabletop by its edges alone: Rather than supporting it fully from underneath during placement.
- Ignoring a persistent wobble: Rather than checking the frame for a genuine misalignment before continuing to tighten fixings that are already secure.
What to Do If Something Goes Wrong
Occasionally, a part arrives missing, damaged, or genuinely does not fit as expected. This is worth knowing how to handle calmly rather than as a reason to abandon the build.
If a part is missing or damaged, stop and contact us with your order details before continuing assembly. Every KosyKoala product comes with a 12-month warranty, and replacement parts are normally straightforward to arrange without needing a full return. If a fixing genuinely will not thread properly, stop turning it rather than forcing it, since a stripped fixing is far harder to resolve than a replacement part requested early.
If you are not confident in completing assembly yourself, our full dining table and chairs range includes clear, illustrated instructions with every order, and our customer service team can talk you through a specific step if you get stuck partway through.
Disposing of Packaging Responsibly
Once assembly is complete, you are usually left with a genuine amount of cardboard and protective packaging. Most of this is recyclable through standard UK kerbside collection, though it is worth checking your local council’s specific guidance, since polystyrene and certain plastic wraps are not accepted everywhere. The UK government’s household recycling guidance is a useful starting point if you are unsure what your local collection accepts, and breaking down cardboard boxes flat makes both storage and collection considerably easier in the meantime.
Preparing the Room Before the Boxes Arrive
A little preparation before delivery day makes the whole process smoother, and it is worth doing the evening before rather than scrambling once the boxes are already sitting in your hallway.
Clear the space where the table will sit, including anything currently on the floor nearby that could get knocked or scratched during assembly. Check the delivery route into the room, particularly doorways and any tight turns in a hallway or staircase, since a boxed tabletop is often wider than it looks and can be awkward to manoeuvre through a narrow gap. If you plan to lay protective cardboard or a blanket down for assembly, have this ready in advance rather than searching for something suitable once the boxes are already open.
It is also worth thinking about disposal in advance. Flat-pack furniture generates a genuine amount of packaging, and having a plan for where it will go, even temporarily, prevents the room from feeling chaotic mid-build.
Working With Different Table Base Styles
Not every dining table uses the same four-corner-leg structure covered in the main steps above, and it helps to recognise which type you have before you start.
A pedestal base, a single central column rather than four separate legs, generally involves fewer individual fixings than a four-leg design, though the base itself is often heavier and benefits from a second person to position it correctly on the tabletop. An X-frame or hairpin leg design, increasingly common in contemporary dining sets, usually bolts together as a pre-shaped unit before attaching to the tabletop as a single piece, rather than four separate legs fitted individually.
Whichever base style your table uses, the same core principle from this guide still applies: attach fixings loosely first, check that the whole structure sits square, then tighten fully as a final, separate stage.
Frequently Asked Questions
How long does it take to assemble a flat-pack dining table and chairs?
A straightforward four-seater table with matching chairs typically takes one to two hours for one person, or noticeably less with two people working together, particularly for larger sets or anything with a glass top.
Do I need power tools to assemble a dining table?
Not usually. The tools provided are generally sufficient. A power screwdriver can speed up the early, loose-tightening stage, but hand tightening is recommended for the final stage to avoid over-tightening.
Why does my assembled table wobble even though everything is tightened?
This is often a sign that the frame was tightened before being properly squared, or that your floor itself is slightly uneven. Check the frame alignment first, then use adjustable feet if the table has them, rather than continuing to tighten fixings that are already secure.
Can I assemble a glass-top dining table on my own?
The frame can generally be assembled solo, but placing the glass top safely is much easier and safer with a second person, particularly for larger tables.
What should I do if a part is missing from the box?
Contact us with your order details before starting assembly. Replacement parts are normally straightforward to arrange, and it is far easier to resolve this before the build begins than partway through.
Should I tighten screws fully as I go, or wait until the end?
Wait until the end. Leave every fixing loosely attached until the whole frame is checked and square, then tighten fully as a final, separate stage. This uses the small amount of built-in adjustment tolerance properly.
A Steady Build Makes a Steady Table
A flat-pack dining table is one of the more manageable pieces of furniture to assemble yourself, provided you work through it in order rather than rushing to the finish. Check your parts first, build loosely before tightening fully, and give a glass top the careful two-person handling it deserves. The result is a table that sits properly level and stays that way for years of daily use.
For the fuller picture on choosing the right table and chairs before assembly day even arrives, our complete dining table and chairs buying guide and our dining table dimensions guide cover size, shape and material in depth. When you are ready to order, browse the full dining table and chairs range at Kosy Koala.
Five Kosy Koala Sets With Genuinely Straightforward Assembly
If ease of assembly is a real priority, these five sets from our range use simple, four-leg constructions with a manageable number of parts, worth considering alongside style and size.
Round Black Glass Dining Table With 4 Black Chairs
Table: 90cm diameter, tempered glass top on a simple four-leg frame.
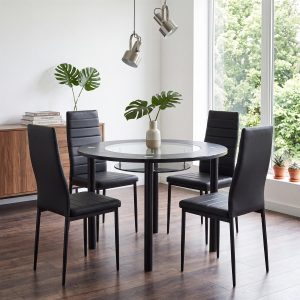
A compact glass-top table with a straightforward frame and a small number of fixings per leg, making it one of the quicker glass-top builds in our range for a solo assembler with a helping hand for the glass placement stage.
Shop: Round Black Glass Dining Table With 4 Black Chairs
Modern Rectangle Glass Dining Table With 4 Grey Velvet Chairs
Table: 120cm x 70cm, glass top with a simple metal frame.
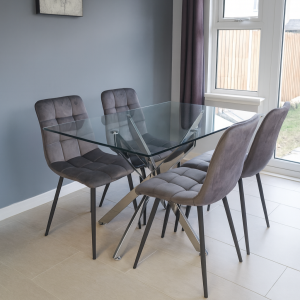
A slightly larger rectangular glass table using the same straightforward frame assembly as our round options, paired with velvet chairs that follow the standard loose-then-tighten build described in this guide.
Shop: Modern Rectangle Glass Dining Table With 4 Grey Velvet Chairs
Modern Rectangle Glass Dining Table With 4 Mustard Gem Pattern Chairs
Table: 120cm x 70cm, glass top.
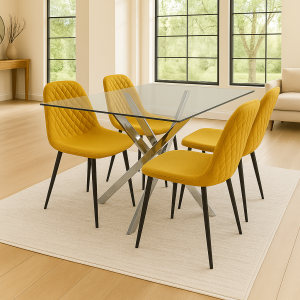
Same simple frame as our other rectangular glass tables, paired with distinctive diamond-stitched chairs that assemble using the standard chair method covered in this guide, one at a time, checked for square before final tightening.
Shop: Modern Rectangle Glass Dining Table With 4 Mustard Gem Pattern Chairs
Modern Rectangle White Dining Table With 4 Mixed Plastic Chairs
Table: 120cm x 70cm, wood-effect finish.
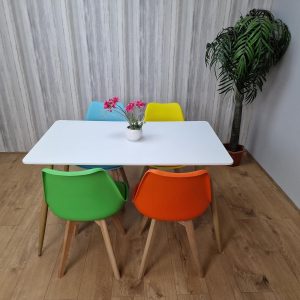
No glass handlingis required at all, making this one of the simplest builds in our range from start to finish. The mixed plastic chairs are lightweight and quick to assemble individually, well suited to a first-time flat-pack builder.
Shop: Modern Rectangle White Dining Table With 4 Mixed Plastic Chairs
Round Glass Dining Table With 4 White and Black Chairs
Table: 90cm diameter, tempered glass top.

A compact table with the same manageable four-leg frame as our other round glass options, a solid choice if you want a genuinely quick build without compromising on a contemporary glass finish.
Shop: Round Glass Dining Table With 4 White and Black Chairs
Browse the full range at kosykoala dining table sets.
Recommended Supporting Articles
- Dining Table and Chairs Sets: The Complete UK Buying Guide
- How Many Seats Do You Actually Need at Your Dining Table?
- Dining Table Dimensions Guide: How Much Space You Need Per Seat
- Dining Bench vs Dining Chairs: Which Should You Choose?
- Extendable vs Fixed Dining Tables: Which Suits Your Home?
About the author
This article was written by the Kosy Koala team. We design and source furniture for UK homes, with a focus on practical details that actually matter once a piece is in your room. Have a question about any product on this page? Get in touch through our about us page.


 Dining Tables
 Dining Chairs

 Bed Frames
 Mattresses
 Bunk Beds
 Sofa & Sofa Beds


